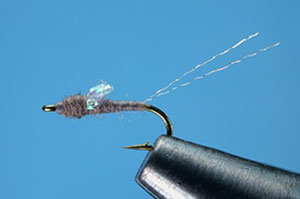
Drowned Trico
From the book LaFontaines Legacy
By Al and Gretchen Beaty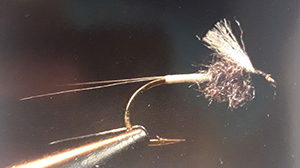
Translated by Carl Wuebben
Some of the toughest fishing could be when the female tricos were laying their eggs. At that time the fish tend to hold under the surface, feeding on the drowned adults rather than exposing them by eating the spinners on the surface. Gary believed he got better results using a submerged fly rather than a dry one during a heavy trico spinner fall.
PATTERN
HOOK – 1x long dry fly size 18 to 22
THREAD – white and black 6/0
TAILS – two blue dun hackle fibers, split
ABDOMEN – white thread 6/0
THORAX – black thread 6/0 and black touch dubbing
WING – clear antron fibers, sparse, slightly longer than the thorax
HOW TO TIE
- Debarb the hook - mount in vise and attach the white thread in the center of the shank, now using the tag end of the thread and keeping it up on top of the shank wrap rearward toward the hook bend making a thread base and ending just before the bend of the hook. But don’t cut the tag end yet.
- Select two blue dun hackle fibers, and tie them to the back of the hook to form a tail (about one hook shank length long). Secure them with a couple thread wraps. Pull the thread tag end between the two fibers to separate them. After achieving the desired separation, anchor the thread to the hook while advancing it back to the center of the hook while keeping close thread wraps again. Trim off the waste part of the tail and the extra thread. Whip-finish and clip the thread off.
- Attach black thread next to the white in the center of the hook and trim off the tag end. Coat the thread with super tacky dubbing wax then apply black touch dubbing to the thread by “patting” the clump to the tacky strand. Do not twist the dubbing: instead wrap the thread around the front of the hook to form the thorax (leave some space for the wing). Leave the thread hanging near the front of the hook.
- Select a sparse clump of clear antron fibers, and tie them to the hook to form a wing (behind the hook eye) use about eight fibers on a fly smaller than a size 20. Clip the tag end of the fibers and form a small Head.
- With a pair of scissors trim the wing short (slightly longer than the thorax). Whip-finish – clip the thread and put some head cement on to complete the fly.
TIE UP A DOZEN OR TWO – AND GO FISHING*** But remember to practice C.P.R. (CATCH – PICTURE – RELEASE)