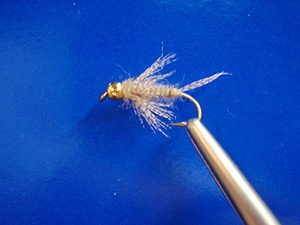
BEAD – HEAD BIRD’S NEST
CAL BIRD
If you’re always looking for a pattern that is quick to tie and also very effective then Cal Birds bird’s nest will fill your needs. It’s been around for 30 years or more and seems to be more popular each year. It’s very effective because of it being quite generic in shape and materials. Tie it with a shaggy and spiky body that gives it a lifelike and buggy quality. It can imitate a mayfly, dragonfly, damselfly and stonefly nymphs depending on the size and color you tie it in. You can also use the bead head or a leaded body if you prefer and change colors and materials to fit your needs. Opossum can be replaced by hare’s ear. Wood duck can be replaced by dyed mallard or even partridge.PATTERN
HOOK – Standard nymph Mustad #3906B #16 - #6
HEAD – Gold metal bead in size to match hook
THREAD – Tan or brown 6/0 or 8/0
TAIL - Wood duck flank or dyed mallard flank to match
BODY – Australian opossum with guard hairs or hare’s mask
RIBBING – Copper wire HACKLE – Wood duck flank or dyed mallard flank to match
THORAX- Same as bodyHOW TO TIE
- Debarb hook – put bead on hook (small hole in bead first) – slide forward to the eyelet – start thread behind bead head and lay a small bump behind it to keep it in place - then bring your thread to the back of the hook shank just before the bend .
- Remove 3 to 8 fibers from the wood duck feather and tie them in for your tail (butts facing the eyelet and it should be the length of the shank) the number of fibers depends on the hook size. Attach the copper wire in at the point where the tail is tied in. Clip tag ends.
- Twist some opossum dubbing onto your thread – then dub a body a little thicker than normal with a little taper on it (thin in the rear – thicker in the front) leaving a space between the dubbed body and the bead. (You will need the space for the thorax). DUBBING TIP- Put a thin layer down first then go back and build your taper after you got your base layer down.
- Wind your copper wire forward in a reverse direction of the body – about 4 to 6 turns and tie off.
- The original pattern said to remove 12 to 20 fibers from your wood duck and carefully wrap them around the shank which is a real pain. I left the wood duck together but ran my fingers down the feather shank to fluff out the fibers then just cut a small piece from the feather (cut the shank of the feather) and you can tie in a small bunch on each side then clip it from the shank after you have it tied in securely. They should be a little shorter than the body. Just remember to lay the fibers toward you and the thread tension will roll the feather a little and fan out like you want them to do.
- Apply a small amount of dubbing to your thread and wind a couple of turns forward right up against the bead to form the thorax. Whip finish – apply head cement if you want.Use a dubbing needle or your bodkin to pick out the body and the thorax to make it more buggy looking.


