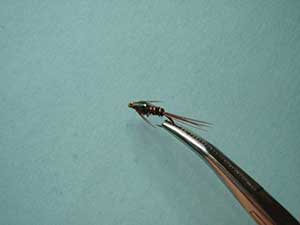
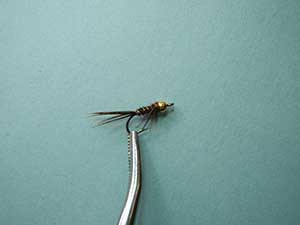
Flashback Pheasant Tail Nymph

Frank Sawyer, MBE
Translated by Carl Wuebben
This is a version of the original conceived and tied by FRANK SAWYER, MBE, an English river keeper. The pheasant tail nymph is one of the oldest of modern nymphs. Frank devised the pattern for use on the chalk streams of southern England. He designed this nymph to imitate several species of the BAETIS family, generally referred to as the “olives”; it quickly became world famous. Franks pheasant tail suggests many of the skinny nymphs that flourish in various habitats, exciting riffles to alluring deep holes in rivers bed of chalk streams or spring creeks; and in Stillwater’s of all sizes
HOOK – Standard nymph, sizes #14 - #16 - #18 - #20 -#22. Try a scud hook also
THREAD – Brown- 6/0 or 8/0.
TAILS – Ring neck pheasant tail fibers.
ABDOMEN – Butts of ring neck pheasant tail fibers.
RIB – Fine copper wire.
SHELLBACK – Pearl flashabou.
LEGS – Pheasant tail fibers.
THORAX – Peacock herl.
HOW TO TIE
- Debarb the hook- mount in vise – start your thread behind the eye and lay a thread base all the way to just before the bend of the hook (this gives the material something to hang on to). Now select three or four longer fibers from the center of a ring necked pheasant tail feather. Measure the tips the length of the hook shank, and tie them in at the rear of the shank (This is your tail) secure the butts down on the shank. We will wrap this like herl later to make the body (Abdomen).
- Clip 2 or 3 inches of fine copper wire for the rib. Tie in at the base of the tail with tight wraps and the longer part hanging toward the rear of the hook. Now take the pheasant tail butts you should have at the rear of the hook and wrap them forward half way to two thirds up the shank of the hook, then tie off and clip off the tag end – If you end up not having enough herl just tie in another couple fibers and keep going.
- Tie in your flashabou right up against the abdomen (wrapped pheasant tail fibers) two or three inches should do (two strands) and keep it on top of the shank. Advance your thread to about two or three eyelets from the eye, then even up the tips of the fibers of some more pheasant tail fibers (x6) and measure the tips about the length of the hook shank and tie in where your thread is now and the tips hanging over the eye of the hook and on the top of the shank (These will be reversed later for your legs of the fly). Wrap the thread rearward over the butts of the fibers and end tight to the front of the abdomen. Clip tag ends off.
- Tie in two or three peacock herl fibers by the tips and at the base of the shell back (flashabou). Make a herl rope by lightly twisting the herl around the thread in a clockwise direction then wrap the peacock herl rope forward and stop one eyelet space from the eye and tie off and clip off the tag end of the herl (You will need this slight gap between the eye and the end of the thorax to tie off the shell back). Counter wind the copper wire at the rear of the fly forward thru the pheasant tail abdomen and the peacock herl thorax and end it and tie off just behind the eyelet, the wire can be clipped off with some dull scissors or just put a little pressure with your finger on one hand at the point you want it to break off and with the other hand just bend the wire back and forth with a little pressure and it will give.
- Draw the shell back flashabou over the top of the peacock herl thorax, and tie them off tightly in the gap between the thorax and the hook eye then clip off the tag end of the flashabou (Make sure you leave enough room for the head of the fly).
- Separate three leg fibers (hanging over the eyelet) to each side. If you don’t have that precise number, don’t worry – trout can’t count. Pull the fibers back along the side of the fly. Take one turn of thread over them to lock them in place. Pull the fibers back and down along the side of the fly; take another turn of thread to lock them in place. They should slant back and slightly down. Form a need head behind the eyelet, whip finish and cement the head.
TIE UP A DOZEN OR TWO – AND GO FISHING ***but remember to practice C.P.R. (CATCH-PICTURE-RELEASE).


